


« June 2008 | Main | December 2008 »
October 28, 2008
Removing the suspension
The following series of pictures shows my Charger starting out on jackstands with the tires and wheels removed, displaying, hopefully for the last time, its sad stock ten-inch drum brakes. I wanted to remove as many of these parts as possible prior to priming and painting.
Upgrading the brakes is not the only thing I have in mind for this phase of my project. When this goes back together, I will install Hemi .960 front torsion bars and stock XHD 440/Hemi leaf springs. I have all new polygraphite bushings to install throughout, a firm-feel steering box, 12-inch front rotors from a Chrysler Cordoba riding on disc-brake spindles from a '73 Valiant, and 11" HD drums out back. I will also upgrade to a 1 1/8" diameter front sway bar.
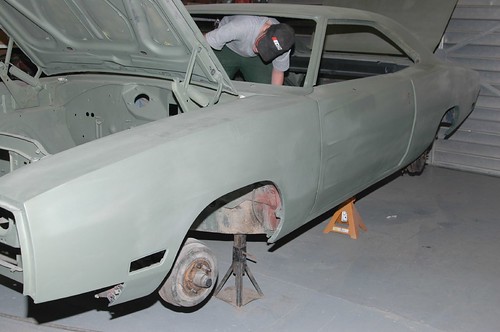
My son, just completing the removal of the steering column.
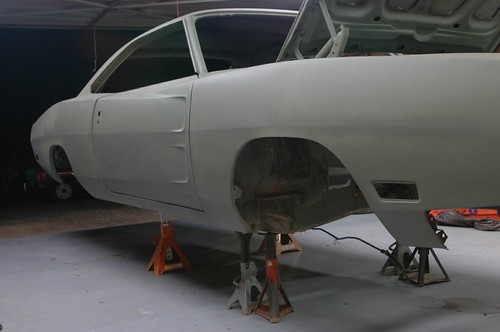
This picture, in addition to showing the absence of the suspension, shows fairly well what I have been doing these last months on my car. I have been working very hard to get my body lines straight and appropriately crisp. I think they show fairly well in this photo.
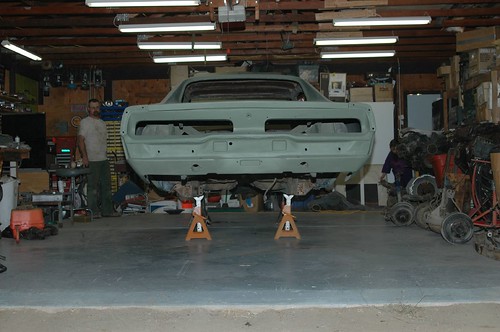
Rear view of the car; rear-end, springs and shackles all had to go as well.
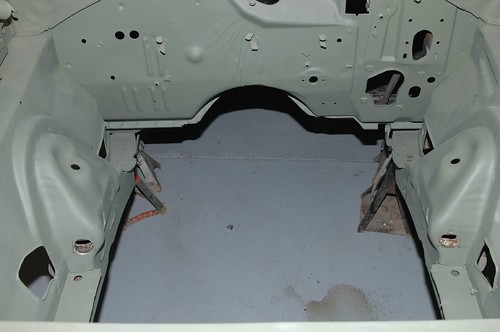
Having the engine bay this clear should make it extremely easy to get the primer and paint everywhere I need them to be, prior to reinstalling the restored and upgraded front suspension and K-member.
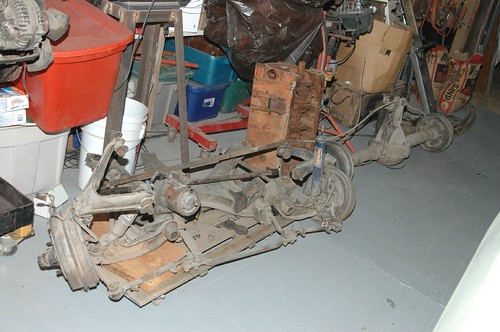

It is really something I thought I would never see, looking at this pile of parts in the side of my garage. It will be a lot of fun this winter to disassemble, clean, restore, and upgrade all of these assemblies prior to installation, after the paint goes on.
Posted in 2004-present | RESTORATION | body | disassembly | suspension, brakes, tires, and wheels | link to this page | | Comments (1)
One last sandblasting chore
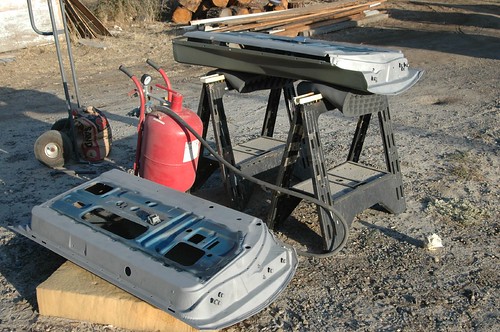
As the day to put primer on my Charger draws near, I realized I had neglected to strip the old paint and minor surface rust, etc., off the inner part of my doors. I had used a wire wheel on my grinder to remove all the paint from the door jamb area of the car body itself, but wanted a good fresh start on the doors. My son and I removed the doors, gutted the latches and window regulators etc., and set them outside for sandblasting. The red tank-looking object between the doors in the first photo is my inexpensive but very serviceable sandblaster.
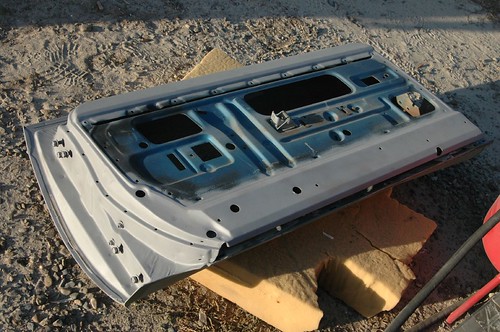
This is a closeup of the areas I sandblasted. I protected the outside edge of the door, which already has primer on it, with a heavy layer of masking tape prior to sandblasting. I was very pleased with the results. All the rust, all the paint, all the years of glue, etc., are gone. After this, the doors were taken inside the garage and etching primer was applied to all the bare metal.
Posted in 2004-present | RESTORATION | body | disassembly | sandblasting | sanding | link to this page | | Comments (0)